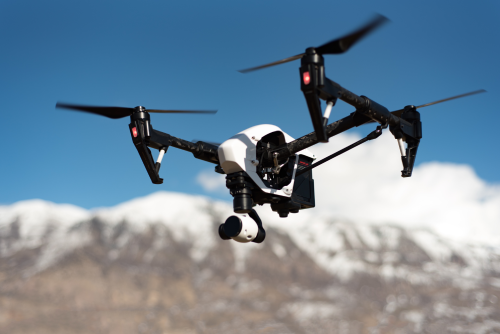
Good-looking aerial video is rarely about flying fast or buying the most expensive drone. Cinematic drone shooting techniques for beginners are mostly about slow movement, better light, clean framing, and simple shot planning. If you learn a few repeatable moves and shoot with intention, even an entry-level drone can produce footage that feels polished and professional.
Quick Take
- Fly slower than you think you need to.
- Plan 3 to 5 shots before takeoff instead of recording randomly.
- Shoot in soft light, especially early morning or late afternoon.
- Use a fixed white balance and keep ISO low for cleaner footage.
- For natural motion blur, match shutter speed to about double your frame rate.
- Start with easy moves like push-ins, pull-backs, rise reveals, and side tracks.
- Keep the horizon level and include foreground, background, or scale where possible.
- In India, always verify the latest DGCA, Digital Sky, and local site rules before flying.
What makes drone footage look cinematic
“Cinematic” does not mean dramatic for the sake of it. It usually means the footage feels intentional.
A cinematic drone shot often has these qualities:
- Smooth, controlled motion
- A clear subject
- Good light
- Balanced composition
- Consistent exposure and colour
- A sense of scale or story
The biggest beginner mistake is thinking cinematic means aggressive movement. In reality, fast yaw turns, sudden altitude changes, and random pans usually make footage feel amateurish.
If you remember only one idea from this article, remember this: cinematic drone video is more about restraint than tricks.
Plan the shot before you launch
Most beginners waste battery by deciding everything in the air. Better results come from planning on the ground.
Build a simple shot list
Before takeoff, answer three questions:
- What is the subject?
- What mood do I want?
- Which 3 to 5 shots tell that story?
For example, if you are filming a farmhouse, homestay, lake edge, or coffee estate with permission, your shot list could be:
- Wide establishing shot
- Slow rise reveal over trees
- Side tracking shot showing depth
- Slow push-in toward the main subject
- Pull-back ending shot
That is enough for a short, strong sequence.
Choose the right time in Indian conditions
Light changes everything.
In many parts of India, the hardest time to shoot is midday. The sun is harsh, shadows are ugly, and landscapes can look flat. Heat haze can also reduce sharpness, especially over roads, water, fields, and city rooftops.
Better options:
- Sunrise to about 2 hours after sunrise
- Late afternoon to sunset
- Slightly overcast days for softer light
Also think about local conditions:
- Summer: heat haze and battery stress
- Monsoon: unpredictable gusts, moisture, low visibility
- Winter: fog, smog, and flat light in some regions
- Coastal areas: strong winds can build quickly
- Tourist spots: crowds grow fast after morning hours
If you want cinematic footage, good timing matters more than fancy editing.
Walk the location first
Before flying, check:
- Takeoff and landing area
- Obstacles like cables, trees, poles, towers, and cranes
- Wind direction
- Bird activity
- Safe flight path for your planned shots
- Any people entering the frame unexpectedly
A reveal shot may look beautiful in theory, but not if there is a hidden power line behind a tree line.
Camera settings that help immediately
You do not need to become a camera expert overnight. But a few settings make a huge difference.
Resolution and frame rate
If your drone supports 4K and your device can edit it comfortably, use it. If not, 2.7K or even 1080p can still look good when the shot itself is strong.
For frame rate:
- Use 24 fps or 25 fps for a classic cinematic look
- In India, 25 fps is often practical, especially around artificial lighting due to 50 Hz power frequency
- Use 50 fps only if you plan to slow the footage down on a 25 fps timeline
Do not shoot everything in high frame rates just because the option exists. Too much slow motion can make a video feel repetitive and less natural.
Shutter speed, ISO, and ND filters
For natural-looking motion, a common rule is:
- 25 fps: shutter around 1/50
- 50 fps: shutter around 1/100
In bright daylight, that usually means your footage will become overexposed unless you use an ND filter.
An ND filter, or neutral density filter, is basically sunglasses for your drone camera. It cuts light so you can keep a slower shutter speed.
Keep ISO as low as possible. Higher ISO adds noise and makes footage look less clean, especially in shadows and low light.
White balance and colour
Avoid auto white balance for cinematic video.
Why? Because the colour can shift during the shot. One moment the scene looks warm, then cooler the next moment. That looks distracting in an edit.
Instead:
- Set white balance manually if your drone allows it
- Keep it consistent for the whole scene
- If your drone has Normal and Flat/Log colour profiles, beginners usually get easier results with Normal unless they already know how to colour grade
Flat or Log profiles can preserve more detail, but they can also look dull and messy if you do not grade them properly later.
Gimbal and control settings
Many drones allow smoother control through settings such as:
- Cine or Tripod mode
- Lower yaw sensitivity
- Softer braking
- Slower gimbal pitch speed
If these options exist on your drone, use them for video.
This is one of the easiest ways to make footage look more expensive.
8 cinematic drone shooting techniques for beginners
Do not try all of these in one battery. Pick two or three and repeat them until they become smooth.
1. Slow push-in
Fly slowly toward the subject in a straight line.
Why it works: – Builds focus – Feels clean and professional – Great for buildings, statues, boats, isolated trees, or landscape features
Beginner tip: Do not yaw left and right while pushing in. Keep the move simple.
2. Pull-back reveal
Start with the subject framed tightly, then fly backward or backward and upward to reveal the wider environment.
Why it works: – Creates drama – Shows context and scale – Works well for valleys, forts, large properties, and waterfronts where flying is permitted
Beginner tip: Check behind the drone before starting. Backward flight is where many beginners misjudge space.
3. Rise reveal
Start low behind a foreground element such as a wall, row of trees, rocks, or rooftop edge on a permitted property, then slowly rise until the scene opens up.
Why it works: – Instantly adds storytelling – Creates a “discovery” moment – Makes ordinary locations feel more cinematic
Beginner tip: Do not do blind ascents in unknown spaces. Walk the location and check for cables or branches first.
4. Side track with parallax
Fly sideways while keeping a subject in frame. If there is foreground closer to the camera and background farther away, the scene gains depth. This effect is called parallax.
Why it works: – Makes landscapes feel three-dimensional – Adds motion without needing speed – Great for roads, tree lines, walls, fields, and water edges
Beginner tip: A small amount of side movement is enough. Too fast and the shot becomes hard to watch.
5. Orbit
Circle slowly around a subject while keeping it framed.
Why it works: – Gives a premium, cinematic feel – Shows shape and surroundings – Useful for isolated buildings, monuments, rock formations, or lone trees in open space
Beginner tip: Use a wide orbit radius. Tight circles are much harder to fly smoothly.
6. Static hover with gimbal tilt
Hold the drone still and move only the camera tilt very slowly.
Why it works: – Safe and easy – Perfect in light wind – Good for revealing a landscape from ground texture to horizon, or vice versa
Beginner tip: This is an excellent backup shot when conditions do not allow complex movement.
7. Forward and up “crane” move
Fly forward while slowly ascending.
Why it works: – Adds scale – Feels elegant – Works well over paths, rivers, farms, and open countryside
Beginner tip: Keep both the vertical and forward movement gentle. If both are too aggressive, the shot feels rushed.
8. Top-down drift
Point the camera straight down and move slowly across patterns, roads, water edges, fields, or architectural geometry.
Why it works: – Turns simple places into graphic compositions – Great for symmetry and texture – Especially useful in agricultural landscapes, courtyards, and patterned terrain
Beginner tip: Make sure the shot has a clear design. A random top-down view is not automatically cinematic.
Composition tips that instantly improve your footage
Camera movement matters, but framing is just as important.
Keep the horizon level
A slightly tilted horizon can ruin an otherwise good shot. Check it before every sequence, especially after quick turns or after landing and taking off again.
Use the rule of thirds
Instead of keeping the subject dead centre in every shot, place it slightly off-centre. This usually feels more natural and gives the frame breathing room.
Include foreground, middle, and background
Depth makes drone footage feel richer.
For example:
- Foreground: tree branch, rooftop edge, wall, rocks
- Middle: your subject
- Background: hills, lake, skyline, fields
This is especially useful when filming landscapes that otherwise look flat from above.
Show scale
Aerial footage becomes cinematic when viewers understand size.
Ways to show scale:
- Include a road curving through the frame
- Show a person only if it is safe, legal, and planned
- Include buildings, boats, fields, or tree clusters for comparison
Scale is one reason wide Indian landscapes, ghats, tea estates, salt pans, riverbeds, and hill roads can look striking from a drone.
Simplify the frame
Do not try to include everything.
If the subject is a fort, don’t let messy parking lots, random hoardings, or distracting rooftops steal attention unless they are part of the story.
Cinematic footage often looks clean because the frame has one main idea.
A simple 30-second cinematic sequence beginners can copy
If you struggle with storytelling, use this template.
Imagine you are filming a private property or open location where you have permission to fly.
Shoot these clips:
- Wide establishing shot, 5 seconds
- Rise reveal, 5 seconds
- Slow push-in, 5 seconds
- Side tracking parallax shot, 5 seconds
- Top-down detail shot, 4 seconds
- Pull-back ending shot, 6 seconds
That gives you a 30-second sequence with a beginning, middle, and end.
When recording, capture each clip for longer than you think you need, usually 10 to 15 seconds. In the edit, you can trim the best part.
This is a much better workflow than recording one long random flight and hoping to “find” a film later.
Editing for a cinematic feel
Good shooting matters most, but editing is where footage becomes a sequence.
Keep clips short and purposeful
Most beginner drone videos are too long.
A strong drone clip is often only:
- 3 to 6 seconds in a fast-paced edit
- 5 to 8 seconds in a calm cinematic edit
If a clip stops adding value, cut it.
Match your clips
Before adding music or effects, make sure the clips feel consistent.
Check:
- Exposure
- White balance
- Contrast
- Saturation
- Horizon level
Even a simple edit looks better when all shots feel like they belong together.
Be gentle with colour
A common mistake is adding too much contrast, too much saturation, or a heavy preset.
Instead:
- Recover highlights if possible
- Lift shadows carefully
- Add a little contrast
- Warm or cool the image slightly if it helps the mood
- Keep skin tones and greenery believable
If the colours scream “edited,” the cinematic feel is gone.
Use transitions sparingly
Most of the time, straight cuts are enough.
Fancy transitions often distract from the actual footage. A clean cut between two well-composed aerial shots looks more professional than an overused spin or flash effect.
Add sound with restraint
If you are using music, cut on rhythm only when it feels natural.
Also consider ambient sound in the final video if it was recorded separately on the ground. Windy drone audio itself is usually not usable, but sound design can make a short cinematic reel feel much more complete.
Safety, privacy, and legal checks in India
Drone videography is not just about creativity. It is also about responsibility.
Before flying in India, verify the latest official guidance that applies to your drone, your location, and your purpose of use. Rules can vary based on the category of drone, whether the flight is recreational or commercial, where you are flying, and what permissions may be needed.
As a practical beginner checklist:
- Check the latest DGCA and Digital Sky guidance before each serious shoot
- Confirm whether the area has local restrictions or site-specific permissions
- Avoid airports, helipads, defence areas, government-sensitive zones, and other restricted locations
- Do not fly over crowds, traffic, public gatherings, or festival areas
- Respect privacy around homes, apartments, resorts, and private land
- Be cautious near wildlife habitats, bird-heavy areas, and protected locations
- Keep visual line of sight
- Maintain safe battery reserve for landing
- Set the correct home point and return-to-home altitude carefully
For paid shoots, client properties, events, hotels, and commercial content, do not assume verbal approval is enough. Verify documentation and permissions properly.
When in doubt, do not fly until you confirm the current rule.
Common mistakes beginners make
These mistakes are very common, and fixing them can improve your footage immediately.
Flying too fast
Fast flight looks exciting in real life but often looks messy on video.
Fix: Use cine mode and slow down.
Shooting only at midday
Harsh overhead sun can make even a beautiful location look dull.
Fix: Shoot in morning or late afternoon whenever possible.
Leaving everything on auto
Auto exposure and auto white balance can shift during a shot.
Fix: Lock the important settings before recording.
Overusing yaw turns
Constant left-right rotation makes footage feel nervous.
Fix: Use straight moves first. Add gentle yaw only when you can control it smoothly.
Trying complex moves in tight spaces
Orbiting around a subject close to trees, wires, or walls is risky and usually jerky for beginners.
Fix: Practice in large open areas.
Recording random clips with no sequence
A collection of unrelated aerial shots is not a cinematic video.
Fix: Plan a beginning, middle, and end.
Ignoring wind
Even if the drone can handle it, the footage may not look good.
Fix: Avoid gusty days, especially near coasts, hills, and during monsoon conditions.
Over-editing
Heavy colour, too much sharpening, and flashy transitions can make footage look worse.
Fix: Edit with a light touch.
FAQ
Do I need an expensive drone to shoot cinematic video?
No. A basic camera drone with stable hover, decent video quality, and smooth controls is enough to learn cinematic shooting. Technique matters more than price at the beginner stage.
Is 4K necessary for cinematic footage?
Not always. 4K helps with detail and cropping, but composition, light, and motion matter more. A well-shot 1080p clip can look better than a badly shot 4K clip.
Should I shoot at 24 fps or 25 fps in India?
Either can work, but 25 fps is often a practical choice in India, especially around artificial lighting. The most important thing is to stay consistent within one project.
Do ND filters really make a difference?
Yes, especially in daylight. They help you keep a slower shutter speed, which gives motion a more natural and cinematic look.
What is the easiest cinematic drone move for a beginner?
A slow push-in or a static hover with gentle gimbal tilt. Both are simple, effective, and much easier to control than tight orbits.
How high should I fly for cinematic shots?
Usually lower than beginners expect. Very high shots can look generic unless the landscape is special. Medium height often gives better depth and stronger subjects. Always stay within the latest legal and safety limits.
Can I get cinematic footage in windy conditions?
Sometimes in mild, steady wind, yes. But gusty wind often causes shaky movement, uneven tilts, and unsafe flying. If conditions feel unpredictable, postpone the shoot.
Should beginners use Flat or Log colour profiles?
Only if they are ready to colour grade properly. Otherwise, a normal colour profile is often easier and safer for clean results.
What should I verify legally before filming in India?
Check the latest official rules for your drone category, location, permissions, and intended use. Also verify local restrictions, property permission, and whether the site is sensitive, crowded, or otherwise unsuitable for drone flight.
Final takeaway
For your next flight, do not chase ten fancy moves. Pick one safe location, go at good light, lock your basic settings, and shoot just five clean clips: a wide shot, a reveal, a push-in, a side track, and a pull-back. If those five shots are smooth, well-framed, and legally captured, you are already using cinematic drone shooting techniques the right way.
