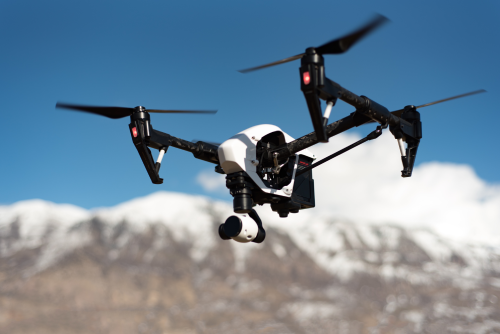
If you want to learn how to shoot construction progress videos with a drone, the biggest shift is this: you are not making a cinematic travel reel. You are creating a repeatable visual record that clearly shows what changed, what stage the site is in, and what the client or project team needs to see.
For builders, architects, consultants, marketing teams, and small drone operators in India, good construction progress videos can become a valuable monthly or fortnightly deliverable. The key is consistency, safety, and a workflow you can repeat every time.
Quick Take
- Construction progress videos are about clarity and consistency more than flashy flying.
- Use the same shot list, heights, angles, and timing on every visit so changes are easy to compare.
- Plan around active-site hazards such as cranes, rebar, concrete pumps, cables, dust, and moving workers.
- For most jobs, slow movements, 4K recording, manual white balance, low ISO, and ND filters give the cleanest results.
- Fly only after checking site permission, surrounding airspace, and current DGCA and Digital Sky requirements for your drone and type of operation.
- Edit for usefulness: date labels, milestone captions, before-and-after comparisons, and short runtimes usually work better than dramatic montages.
What makes a good construction progress video
A strong construction progress video answers simple questions:
- What does the whole site look like today?
- What changed since the last shoot?
- Which zones or structures moved forward?
- Are access roads, materials, equipment, façade, roofing, services, or landscaping progressing as expected?
- Can a client, consultant, or buyer understand progress in under two minutes?
That means your video should focus on four things:
1. Repeatability
A dramatic orbit may look good once, but a repeatable front-elevation shot at the same height every month is more valuable.
2. Site context
Do not only shoot the building. Show the approach road, surrounding boundary, staging area, parking, machinery zones, and nearby development if relevant.
3. Milestone visibility
Different projects need different proof points:
- Residential towers: excavation, slab casting, floor rise, façade, amenities, landscaping
- Warehouses: steel frame, roof sheets, floor finishing, loading bay access
- Roads and infrastructure: alignment, earthwork, culverts, bridges, traffic diversions
- Industrial sites: structure erection, piping, utility corridors, tanks, safety access
4. Safe, stable movement
A calm shot that clearly shows the site is better than an aggressive move that risks people, structures, or the drone.
Safety, permissions, and compliance in India
Before the first battery goes in, treat an active construction site as a high-risk environment.
What to check before you fly
Site permission
Get clear approval from the site owner, developer, contractor, or the person responsible on site. If you are hired by an agency, confirm who has authority to approve drone operations.
Ask for:
- A point of contact on site
- Areas you must avoid
- High-risk activities scheduled that day
- Site timing and worker movement windows
- Any confidentiality or privacy restrictions
Airspace and legal compliance
In India, do not assume site permission is enough. You should also verify the latest official rules that apply to your drone, your location, and your intended operation.
Check, at minimum:
- Airspace status on the official Digital Sky platform
- Current DGCA requirements relevant to your drone category and use case
- Whether your aircraft and operation need any specific permissions, records, or compliance steps
- Whether nearby airports, heliports, defence areas, or sensitive locations affect the flight
- Any local restrictions around urban areas, government sites, or industrial zones
If you are shooting for a client, especially as a business, verify the latest commercial-use compliance requirements instead of relying on old advice from social media or sellers.
Site safety
Construction sites can be more dangerous than they look from the ground.
Watch for:
- Tower cranes and moving jibs
- Suspended loads
- Concrete pumps and boom arms
- Temporary scaffolding
- Rebar projections
- Overhead electrical lines
- Dust, sand, and cement particles
- Reflective surfaces and glass
- Sudden vehicle movement
Privacy and neighboring properties
In Indian cities, many construction sites are close to homes, offices, or roads. Keep the flight focused on the site. Avoid unnecessary lingering over neighboring terraces, windows, or private areas.
Weather and seasonal conditions
Indian conditions matter a lot:
- Summer heat can affect battery performance and create heat haze
- Monsoon winds and rain can shut down flights quickly
- Dusty sites can contaminate motors, gimbals, and lenses
- Low winter haze can reduce detail in morning wide shots
If visibility is poor or winds are unpredictable, postpone the flight.
Plan the video before you charge batteries
The easiest way to get professional-looking progress videos is to plan the deliverable first and the flight second.
Step 1: Define the purpose
Ask the client what the video is for:
- Internal progress tracking
- Client or investor reporting
- Marketing and sales
- Consultant documentation
- Social media updates
- Dispute or milestone record support
This changes what you shoot.
For example:
- Internal reporting needs clear coverage of all zones
- Marketing needs cleaner light and more polished movement
- Social media may need both horizontal and vertical versions
Step 2: Set a shooting cadence
Pick a schedule that matches the construction pace.
Typical options:
- Weekly for fast-moving sites
- Fortnightly for active commercial or residential builds
- Monthly for long projects where visible change takes time
- Milestone-based for foundation, structure, façade, roofing, handover stages
Do not shoot too often if the site barely changes. That only creates repetitive footage.
Step 3: Build a repeatable shot list
This is the heart of construction progress videography.
Use the same 6 to 10 core shots every visit. Record the altitude, gimbal angle, takeoff point, heading, and time of day.
A practical shot list
| Shot type | What it shows | Repeat every visit? |
|---|---|---|
| High establishing wide shot | Full site layout and boundaries | Yes |
| Front elevation hover or slow rise | Main face of the project | Yes |
| Oblique corner view | Depth, structure, and massing | Yes |
| Top-down shot | Floor plates, roof, excavation, material layout | Yes, if safe and allowed |
| Access road approach | Entry, logistics, road readiness | Usually |
| Key work-zone close shot | Specific milestone area | Yes, if milestone matters |
| Rear or side elevation | Hidden progress not visible from front | Usually |
| Final hero wide shot | Clean end frame for edit | Yes |
For each shot, note:
- Altitude
- Distance from building
- Direction faced
- Gimbal angle
- Movement type
- Duration
A simple notes app or spreadsheet is enough.
Step 4: Walk the site from the ground first
Before takeoff, do a 5-minute recce with the site supervisor.
Identify:
- Crane swing path
- Power lines
- Worker-heavy zones
- Safe takeoff and landing space
- Dust direction
- Reflective hazards
- Temporary obstructions since the last visit
A site changes every week. Never assume last month’s takeoff area is still safe.
Gear that actually helps on construction shoots
You do not need the most expensive drone, but you do need reliability.
Minimum useful setup
- A stable camera drone with a good gimbal
- At least 3 batteries for small sites, more for large sites
- ND filters for controlling shutter speed in bright daylight
- A landing pad if the ground is dusty
- Spare propellers
- Microfiber cloth and lens blower
- High-visibility vest and closed shoes
- Power bank or car charger for field use
- Notebook or phone for shot logs
Features that help a lot
GPS stability and strong positioning
Important for holding frame consistency in wind.
Waypoints or saved flight paths
Very useful for repeating the same move over months. Still use them carefully on active sites, and only if you are fully confident about current obstacles and operational safety.
Obstacle sensing
Helpful, but not something you should depend on. Cranes, wires, thin rods, and fast-changing site geometry can still be risky.
Good dynamic range
This helps when shooting concrete, steel, bright sky, and dark shadow areas in the same frame.
Camera settings for clean construction footage
Construction progress videos need consistent color and exposure more than stylised cinematic looks.
Best starting settings for beginners
Resolution and frame rate
For most progress work:
- 4K at 25 fps or 30 fps is a solid default
- Use 50 or 60 fps only if you know you need slow motion later
If the client only needs standard documentation, even lower resolutions may work, but 4K gives you more cropping flexibility.
Shutter speed
A common video rule is to keep shutter speed roughly around double the frame rate for natural motion blur.
Examples:
- 25 fps: around 1/50
- 30 fps: around 1/60
In Indian daylight, you will usually need ND filters to achieve this.
ISO
Keep ISO as low as possible. Construction footage often includes fine details like steel, rebar, mesh, and formwork. High ISO can make them look muddy.
White balance
Use manual white balance instead of auto whenever possible. If you leave it on auto, one shot may look warm and the next may look cool, making monthly comparison harder.
Color profile
- Beginners: use a normal or standard color profile for faster delivery
- Experienced editors: use a flatter profile only if you know how to grade it consistently
If your client wants regular updates fast, simple and consistent is better than “cinematic but unfinished.”
Focus
If your drone allows focus control, confirm focus before recording. Do not assume every clip is sharp.
Histogram or exposure warning
If available, use them. White concrete, reflective metal, and bright rooftops can easily clip highlights.
Flying techniques that work for progress videos
You do not need complex moves. In fact, simpler is usually better.
Use slow, readable movement
The client should be able to inspect the site while watching.
Best movement types:
- Static hover for 5 to 10 seconds
- Slow push-in
- Slow pull-back
- Slow rise
- Gentle sideways reveal
- Controlled oblique arc
Avoid:
- Fast spins
- Sudden yaw inputs
- Low, aggressive passes near structures
- Unnecessary dives
- Tight orbits around cranes or incomplete structures
Keep horizon and framing clean
A slightly tilted horizon instantly makes documentation look amateur.
Before every major shot:
- Stop movement
- Compose the frame
- Check horizon
- Confirm exposure
- Roll for a few extra seconds before moving
Those extra seconds make editing much easier.
Maintain consistent height and angle
If your front tower shot was at 45 metres last month, do not shoot it at 70 metres this month unless the building has risen so much that the original frame no longer works.
When the structure grows taller, adjust logically and note the change.
Be careful near structures
Buildings can interfere with signals and perception. Wind can also behave differently around corners, façades, and open shafts.
Keep a safe buffer from:
- Cranes
- Scaffolding
- Glass façades
- Masts
- Lift shafts
- Rooftop metal structures
A simple on-site shooting workflow
Here is a practical sequence you can follow on most jobs.
1. Arrive early
Give yourself time before peak site activity starts. Early morning often helps with cleaner light and fewer moving machines, though very early haze can be an issue in some cities.
2. Meet the site contact
Confirm:
- What changed since last shoot
- Any restricted areas
- Any crane or pump operation planned
- Where workers are concentrated
- Which milestone needs extra attention
3. Do a short safety recce
Check takeoff zone, wind direction, and emergency landing options.
4. Shoot the repeatable master shots first
Always secure your essential shots before experimenting.
A good order is:
- High site-wide establishing shot
- Main front elevation
- Corner oblique
- Top-down or overhead context shot if appropriate
- Rear or side elevation
- Access road or surroundings shot
5. Shoot milestone-specific coverage
Examples:
- Basement waterproofing
- Podium slab
- Stair core progress
- Roof deck completion
- Façade installation
- MEP external works
- Landscape or boundary wall progress
6. Get one “edit-friendly” hero shot
This is your clean closing shot for the final video. Make it slow, stable, and wide enough for titles if needed.
7. Review clips before leaving
Check for:
- Focus
- Exposure errors
- Glitches
- Horizon tilt
- Missing key views
It is much cheaper to reshoot on site than to explain missing coverage later.
How to make your videos look consistent across months
This is what separates random drone footage from a professional construction progress series.
Keep a shot log
For each recurring shot, note:
- Date
- Time
- Weather
- Altitude
- Direction
- Gimbal angle
- Filter used
- Any site change affecting the shot
Over time, this becomes your template.
Shoot around the same time of day
If one month is shot at 8 AM and the next at 4 PM, the shadows will be completely different. That makes progress harder to compare.
Try to stay within a similar time window every visit.
Use the same aspect ratio and color approach
If one update is oversaturated and the next is flat, the series feels inconsistent. Keep your camera profile and editing treatment stable.
Save custom flight modes if your drone allows it
A slower yaw speed and gentler stick response helps a lot for controlled construction footage.
Editing construction progress videos the right way
The edit should make progress easy to understand, not just look “cool.”
Keep the runtime tight
For most uses:
- 45 to 90 seconds works for social media
- 1.5 to 3 minutes works for reporting and marketing
- Longer only if the client specifically wants detailed zone-by-zone coverage
Structure the edit clearly
A practical structure is:
- Opening title with project name and date
- Full-site establishing view
- Main elevations and structural progress
- Milestone-specific work zones
- Access, surroundings, and finishing works
- Closing hero shot with current status or next milestone
Add useful labels
Simple on-screen text adds value:
- March 2026 Progress Update
- Tower A: 14th slab complete
- Basement ramp under finishing
- External development in progress
Do not clutter the frame with too much text.
Use before-and-after comparison where helpful
Split-screen or matched-angle comparison can be very effective for monthly or quarterly updates.
This works especially well for:
- Excavation to raft
- Floor-rise progress
- Façade installation
- Road or bridge alignment progress
- Landscaping and external works
Don’t use drone audio
Drone propeller noise is almost never useful. Replace it with:
- Light background music
- Voiceover
- Text-only structure
- On-site interview captured separately from the ground, if needed
Deliver the right format
Ask the client whether they need:
- Horizontal 16:9 for presentations and YouTube
- Vertical 9:16 for Instagram or status updates
- A short teaser plus a longer report version
It is smart to frame slightly wider if you know a vertical crop may be needed later.
Common mistakes to avoid
Flying without a repeatable plan
If every visit uses different angles and heights, the video becomes less useful as a progress record.
Shooting only wide shots
Wide views are essential, but they can hide important details. Include closer, safe coverage of milestone areas.
Using auto settings for everything
Auto exposure and auto white balance can shift mid-shot and create inconsistent footage across the series.
Trying to be too cinematic
Construction progress videos are not the place for constant spins, whip pans, or risky low passes.
Ignoring worker and site safety
Never pressure the site team to “clear the way” just to get a dramatic shot. The site’s safety and workflow come first.
Not cleaning the lens
Dust and cement haze on the lens can ruin an entire visit’s footage.
Forgetting the sun direction
Backlit concrete and steel can look flat and low contrast. Plan your main angles around the light.
No backup plan for wind or dust
Some days you may only get a few stable shots. Prioritise the essential ones first.
Delivering a pretty video with no information
If the client cannot tell what changed, the video failed its main job.
FAQ
How often should I shoot a construction progress video?
It depends on how fast the site is changing. Weekly or fortnightly can work for active projects, while monthly is often enough for longer builds. Match the frequency to visible milestones and the client’s reporting needs.
What is the best time of day to shoot?
Usually morning or late afternoon gives better light than harsh midday sun. But for progress comparison, consistency matters most, so try to shoot at roughly the same time on every visit.
Can I use the same flight path every month?
Yes, and you usually should. Repeating the same path, height, and angle makes progress easier to compare. Just re-check the site each time because cranes, scaffolding, and structures may have changed.
Do I need a survey or mapping drone for progress videos?
Not necessarily. For visual progress videos, a stable camera drone is usually enough. Mapping or survey-grade workflows are more relevant when the client needs measurements, orthomosaics, or technical documentation beyond video.
How close should I fly to the building?
Close enough to show detail, but with a safe margin from walls, cranes, cables, and workers. On active sites, conservative distances are usually smarter than trying to get dramatic near-structure shots.
Can I fly over workers?
You should be extremely cautious around people on active sites and avoid unnecessary overflight of workers. Coordinate with the site manager, choose lower-activity windows, and always follow current legal and safety requirements.
What if the site is very small?
On small sites, use fewer but more purposeful shots. A high establishing shot, one front elevation, one oblique view, one top-down frame, and one milestone close shot may be enough.
Should I shoot vertical video too?
If the client wants social media updates, yes. The easiest approach is often to shoot a clean horizontal master version first, then capture a few separate vertical-friendly clips rather than forcing every shot to do both jobs.
How long should the final video be?
For most construction progress updates, 60 to 120 seconds is enough. If the video is for internal reporting, you can go longer, but every shot should still earn its place.
What should I send the client after the shoot?
A polished edit is useful, but many clients also appreciate organized raw files or a simple folder structure by date and location. Confirm this in advance so you do not spend time exporting the wrong deliverables.
Final takeaway
For your next construction shoot, do three things well: create a fixed shot list, fly safely and consistently, and edit for clarity rather than drama. If you can return every month with the same core angles, stable exposure, and clean milestone coverage, your construction progress videos will immediately look more professional and become far more useful to clients.
