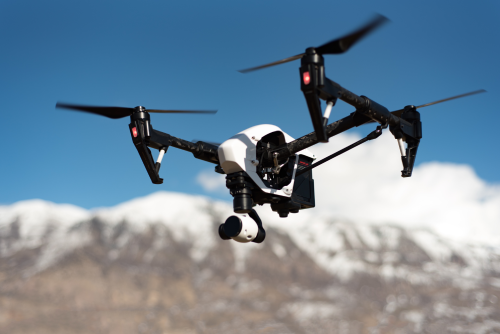
Shaky drone video is one of the fastest ways to make an otherwise good shot look amateur. The good news is that smooth footage usually does not depend on an expensive drone alone. In most cases, it comes down to better pre-flight checks, calmer flying, smarter camera settings, and choosing the right conditions.
Quick Take
If you want to know how to avoid shaky drone footage, focus on these first:
- Fly in calmer conditions, especially early morning or around sunset.
- Inspect propellers before every flight. Even a small chip or bend can create vibration.
- Remove the gimbal clamp, check the gimbal moves freely, and make sure dampers are intact.
- Use your drone’s Cine, Tripod, or Cinematic mode for slower, smoother movement.
- For regular cinematic video, use a sensible frame rate and shutter speed. In India, 25 fps with around 1/50 shutter often works well, especially near artificial lighting because of 50 Hz power frequency.
- Use ND filters in bright daylight if you need to keep shutter speed under control.
- Avoid sudden yaw turns, hard braking, and aggressive climbs or descents.
- Record slightly wider than you need so you have room to stabilize in editing if required.
- Do a 10 to 15 second hover test and review the clip before starting a serious shoot.
- Always verify the latest DGCA, Digital Sky, and local restrictions before flying.
First, identify what kind of “shake” you actually have
Not all shaky footage comes from the same problem. If you diagnose it correctly, the fix is much easier.
| What you see | Likely cause | Best fix |
|---|---|---|
| Sudden jerks at the start or end of a shot | Abrupt stick input, obstacle avoidance braking, fast mode | Use Cine mode, ease in and out, add 2 to 3 seconds before and after the main move |
| Harsh, jittery motion even when the drone is stable | Shutter speed too fast, movement too quick for the shot | Use ND filters in daylight, slow down the drone, match frame rate and shutter better |
| Wavy “jello” lines or vibration | Damaged propeller, motor vibration, poor takeoff surface | Replace props, inspect motors and gimbal dampers, launch from a clean stable spot |
| Horizon tilting or wobbling | Gimbal issue, wind gusts, aggressive yaw | Recheck gimbal calibration if needed, avoid strong crosswinds, make slower turns |
| Blurry or smeared frames | Shutter too slow, low light, moving too fast | Increase shutter slightly, slow the drone down, shoot when there is more light |
| Footage looks choppy on playback | Editing timeline mismatch, export settings, fast lateral movement | Keep frame rates consistent from shooting to editing to export, reduce sideways speed |
Why drone footage becomes shaky
Most shaky drone footage comes from one or more of these five causes:
-
The drone is physically vibrating – Bent or chipped props – Poorly fitted filters or accessories – Takeoff from dusty, uneven, or unstable surfaces
-
The pilot is over-controlling – Sudden stick inputs – Hard yaw turns – Fast braking and last-second corrections
-
The weather is working against you – Wind gusts at flying height – Thermals over hot concrete rooftops – Coastal winds, hill turbulence, or pre-monsoon conditions
-
The camera settings are making movement look worse – Very fast shutter speed in bright daylight – Wrong frame rate for the lighting or delivery format – Exposure changes during the shot
-
The footage is being judged on the wrong screen or workflow – Live feed lag mistaken for recorded shake – Timeline frame rate mismatch in editing – Over-stabilization in post
A lot of beginners blame the gimbal first. Sometimes the gimbal is the issue, but very often the real problem is a combination of pilot input, wind, and camera settings.
Pre-flight checks that prevent shaky footage
The smoothest drone shots are usually created before the drone even leaves the ground.
1. Inspect the propellers carefully
This is the most important habit.
Look for:
- Chips
- Cracks
- Bent tips
- Loose fit
- Uneven wear after a hard landing
A damaged propeller can cause micro-vibrations that the gimbal cannot fully hide. If a prop looks suspicious, replace it. Do not try to “manage” a bad prop on a paid shoot or an important trip.
2. Check the gimbal before every flight
Make sure:
- The gimbal clamp has been removed
- The camera moves freely on startup
- No cable, sticker, dust, or accessory is rubbing against it
- The rubber dampers or anti-vibration mounts are seated properly
If your drone shows a gimbal error, do not ignore it and hope software will fix the shot later.
3. Use a clean, stable takeoff spot
In India, dusty grounds, rooftops, beaches, and construction-heavy areas are common flying environments. These can all affect footage quality.
Avoid taking off from:
- Loose sand
- Gravel
- Dusty concrete
- Uneven paver blocks
- Surfaces with strong heat shimmer
A landing pad helps. At minimum, choose a flat, clean patch.
4. Wait for stable positioning
Do not rush takeoff the second the drone powers on.
Before lifting:
- Wait for proper satellite lock according to your drone’s app
- Confirm home point if your system uses one
- Check for compass, IMU, or gimbal warnings
- Watch for abnormal drift during a short hover
If the drone cannot hold position properly, the footage often looks nervous even before the main shot begins.
5. Do a short hover test
Hover for 10 to 15 seconds at low altitude in a safe open area.
Watch for:
- Visible wobble
- Horizon tilt
- Unusual vibration
- Loud prop noise
- Gimbal twitching
Then record a quick sample and review it. This tiny test can save an entire shoot.
6. Choose better weather, not just “flyable” weather
A drone can be able to fly and still produce bad footage.
For smoother video, avoid:
- Gusty afternoons
- Strong sea breeze
- Pre-storm conditions
- Monsoon rain bands
- Wind funneling between buildings
Lightweight drones are especially sensitive. In many Indian cities, early morning is often calmer than late morning or afternoon, especially in summer.
Camera settings that make footage look smoother
Good flying matters, but camera settings strongly affect how smooth motion feels.
Frame rate and shutter speed
This is where many beginners go wrong.
A common cinematic guideline is the 180-degree rule:
- 25 fps video: shutter around 1/50
- 30 fps video: shutter around 1/60
- 50 fps video: shutter around 1/100
- 60 fps video: shutter around 1/120
Why this matters:
- Too fast a shutter makes every frame very sharp. That sounds good, but motion starts to look harsh and jittery.
- Too slow a shutter creates too much blur and smearing.
For many creators in India, 25 fps with 1/50 shutter is a practical choice, especially when shooting around indoor or event lighting because India uses 50 Hz mains power. This can reduce flicker compared with 30 fps and 1/60 in some situations.
Use ND filters in bright daylight
If daylight is strong, your camera may push shutter speed very high. That can make motion look choppy even when the drone is stable.
An ND filter is like sunglasses for the camera. It cuts light so you can keep shutter speed lower.
Use one when:
- You want cinematic motion blur outdoors
- It is sunny or bright overcast
- Your shutter speed is much higher than your frame rate would suggest
Do not use ND filters blindly in low light. If the image becomes too dark, your footage can get noisier or blurrier.
Lock exposure and white balance when possible
Auto exposure can brighten and darken the shot mid-move. Auto white balance can also shift colour while you are flying. These changes make footage feel less polished and can make motion look more distracting.
If conditions are fairly consistent:
- Lock exposure when possible
- Lock white balance instead of leaving it fully automatic
- Avoid big brightness swings in a single shot
Avoid digital zoom for critical shots
Digital zoom makes small shake more visible. If your drone offers digital zoom, use it carefully. If quality matters, it is often better to shoot wider and crop slightly later.
If possible, sharpen less, not more
Some drones or apps offer picture adjustments. Very aggressive sharpening can make small jitter or vibration stand out more. If your drone allows it, a less harsh image can sometimes look smoother and grade better later.
Flight technique: the biggest difference comes from your thumbs
A 3-axis gimbal helps a lot, but it cannot turn rough flying into elegant footage.
Use Cine, Tripod, or Cinematic mode
Most camera drones offer a slower response mode. Names vary by brand, but the idea is the same:
- Softer acceleration
- Gentler braking
- Smoother yaw
- Better control for video
If your goal is cinematic footage, this should be your default mode.
Start and stop every shot gently
One of the easiest beginner mistakes is this:
- Punch the sticks to begin
- Reach the framing
- Brake hard at the end
That creates obvious jerks at both ends of the clip.
Instead:
- Start moving slowly
- Let the shot settle into speed
- Ease off the controls at the end
- Leave 2 to 3 seconds of extra footage before and after the “main” part of the shot
These extra seconds are called handles, and they make editing easier.
Avoid fast yaw turns
Yaw is the left-right rotation of the drone. Fast yaw is one of the biggest giveaways of amateur drone video.
Try this instead:
- Make yaw changes very small and gradual
- Use wider arcs rather than tight spins
- If orbiting a subject, keep the circle large and slow
A slow orbit around a house, resort, temple area where permitted, or a landscape often looks much more professional than a tight spinning move.
Fly slower than feels natural
Most beginners are simply flying too fast for video.
Smooth drone footage often feels slow in real life but looks just right on screen.
This is especially true for:
- Sideways passes
- Reveal shots
- Descending shots
- Low-altitude tracking
If you think you are flying slowly, try going even slower.
Make one main movement at a time
Complex shots are fine, but they should still be controlled.
Instead of trying to:
- move forward,
- climb,
- yaw,
- and tilt the gimbal all at once
start by mastering one or two movements together.
A good beginner combination:
- Slow forward flight
- Gentle upward gimbal tilt
That alone can create an excellent reveal shot.
Practice these four smoothness drills
If you want quick improvement, repeat these in a safe open area:
-
Straight-line pass – Fly forward at one steady speed for 8 to 10 seconds.
-
Slow reveal – Start behind a tree or wall at a safe legal distance and gently rise or slide to reveal the subject.
-
Large-radius orbit – Circle a subject slowly with a wide arc. Keep distance instead of trying a very tight turn.
-
Rise and tilt – Ascend slowly while tilting the gimbal downward or upward at a steady pace.
These drills train coordination better than random flying.
Indian conditions that often make footage shaky
Smooth footage in India often depends on understanding local conditions, not just drone settings.
Midday heat creates tougher flying
On hot days, especially above rooftops, roads, and concrete areas, rising warm air can make a lightweight drone work harder. The result may be tiny corrections, wobble, or unstable framing.
Golden hour is often easier because:
- Light is softer
- Contrast is lower
- Wind is often calmer
- Motion looks better naturally
Coastal areas can look calm from the ground and still be rough aloft
At beaches and coastal cities, wind higher up may be stronger than it feels where you are standing. Sea breeze can build quickly.
If the drone is constantly fighting the wind, your footage usually shows it.
Hill stations and valleys can create hidden gusts
Mountains, ridges, and valley edges can produce unpredictable air movement. A drone may feel stable for a moment and then get pushed suddenly.
If you are shooting travel content in the hills, leave more margin from obstacles and do not rely on the gimbal to hide gusts.
Urban shoots add wires, GPS challenges, and rushed decisions
In Indian cities, common issues include:
- Power lines
- Rooftop clutter
- Narrow launch spaces
- Interference around tall buildings
- Pressure to “just get the shot quickly”
That last one causes many shaky clips. Rushed flying is rarely smooth flying.
Wedding and event shoots need extra discipline
Wedding drone work often goes wrong because the operator tries to do too much in a short time.
For cleaner footage:
- Keep moves simple
- Avoid flying in gusty conditions near crowds
- Be extra careful around temporary lighting, decorative structures, and cables
- Match your frame rate to the venue lighting when possible
Safety, legal, and compliance checks
Smooth footage is never worth unsafe or non-compliant flying.
Before any shoot in India:
- Verify the latest DGCA and Digital Sky requirements
- Check whether the location is restricted, sensitive, or requires permission
- Respect local authority instructions and property rules
- Avoid flying over crowds, active roads, emergency scenes, or unsafe congested areas
- Maintain visual line of sight unless you are operating under whatever current official permissions may apply
- Do not fly in rain, thunderstorms, or strong gusts
Rules, permissions, and enforcement can change, so verify the latest official guidance before acting. If you are shooting commercially, be even more careful with airspace, documentation, and client expectations.
When the hardware is the real problem
Sometimes technique is fine, but the drone itself is causing the issue.
Replace damaged props early
If your drone has had:
- A rough landing
- A brush with branches
- Sand or dust exposure
- A transport mishap
inspect the props again. Tiny damage can create obvious results in video.
Check filters and accessories
A badly fitted filter or third-party accessory can upset the gimbal. If footage suddenly becomes unstable after adding an accessory, remove it and retest.
Only use accessories that fit properly and do not interfere with gimbal movement.
Do not ignore memory card performance
Sometimes the live feed stutters, and sometimes the recorded file has issues because the storage card is too slow or unreliable.
Use a card that meets the drone maker’s recommended speed requirements, and test it before important shoots.
Be careful with firmware timing
Firmware updates can improve performance, but never update right before an important client job unless you have time to test thoroughly afterward.
If a new update affects gimbal behaviour or flight feel, you want to know before the shoot, not during it.
A simple workflow for smooth footage on every shoot
Use this routine and your results will improve quickly.
-
Check weather and airspace – If wind is gusty or the location is restricted, postpone or relocate.
-
Inspect props and gimbal – No cracks, no clamp left on, no loose accessory.
-
Set camera settings first – Pick frame rate, shutter, and filter before takeoff.
-
Do a hover test – Watch for vibration, drift, or horizon issues.
-
Record one test clip – Review the actual file, not just the screen preview.
-
Fly simpler shots first – Straight passes, reveals, slow orbits.
-
Leave handles – Start early, end late, edit later.
-
Capture a backup take – If the first shot is good, record one more slightly slower version.
That final backup take often becomes the keeper.
What editing can fix and what it cannot
Post-production can help, but it is not magic.
Editing can usually improve
- Mild shake
- Small framing bumps
- Slight horizon correction
- Tiny yaw inconsistency
Editing usually cannot properly fix
- Heavy vibration or jello
- Strong rolling shutter wobble
- Severe motion blur
- Fast jerks from bad piloting
- Clips ruined by wind gusts near obstacles
If you know you may stabilize in post, shoot a little wider than your final frame. Stabilization usually crops the image.
Also, avoid applying heavy stabilization twice in different apps. That often creates warped edges and unnatural motion.
Common mistakes that make drone footage shaky
These mistakes show up again and again:
- Flying in Sport mode for cinematic shots
- Taking off too quickly without checking hover stability
- Ignoring a chipped prop
- Shooting in bright daylight with very fast shutter speed
- Yawing too fast because the subject looks “far away”
- Trying complicated moves before mastering simple ones
- Relying on editing to rescue poor piloting
- Using digital zoom and then wondering why shake looks worse
- Flying at midday in heat and gusts when an early morning shoot was possible
- Judging footage only from the live preview instead of reviewing the recorded clip
Fix these, and most beginners see a huge improvement immediately.
FAQ
Why does my footage still look shaky even though my drone has a 3-axis gimbal?
A gimbal mainly stabilizes the camera’s angle. It cannot fully hide damaged props, strong wind, harsh stick input, or bad shutter settings. If the aircraft is vibrating or being flown aggressively, the footage can still look shaky.
Is 25 fps better than 30 fps for drone video in India?
Not always, but 25 fps is often a practical choice in India, especially around artificial lighting because of 50 Hz mains frequency. Outdoors, both 25 fps and 30 fps can work well if your shutter and editing timeline are set correctly. Just stay consistent through the workflow.
Do ND filters actually reduce shaky footage?
They do not fix real physical shake. What they do is help lower shutter speed in bright daylight, which makes motion look more natural and less jittery. They improve the look of movement, not a vibration problem from bad props or wind.
Can I shoot in Sport mode and still get smooth video?
You can, but it is harder. Sport mode is better for repositioning or certain action shots, not for most cinematic footage. For smooth video, Cine or Cinematic mode is the better starting point.
How much wind is too much for smooth footage?
That depends on the drone, but if the drone is visibly leaning hard, the horizon is wobbling, or you are struggling to keep a steady composition, conditions are already hurting video quality. Wind can also be stronger higher up than it feels on the ground.
Can propeller guards make footage worse?
They can. Depending on the drone, guards may change airflow, reduce efficiency, or add vibration in wind. Use only approved guards and test the setup before an important shoot.
Is 4K smoother than 1080p?
Not by itself. Resolution does not automatically make motion smoother. But shooting 4K and delivering 1080p gives you extra room to crop and stabilize in post without losing as much quality.
Should I calibrate the gimbal or compass before every flight?
Not necessarily. Follow the drone maker’s guidance and the app prompts. Unnecessary calibration is not a cure for shaky footage. If the app shows an issue, or if the drone has had a hard knock, transport shock, or update, then calibration may be appropriate.
Why does my indoor or wedding footage look flickery and awkward?
This is often a frame rate and shutter issue under artificial lights. In India, 25 fps with around 1/50 shutter often behaves better under 50 Hz lighting than 30 fps and 1/60. Venue LEDs can still be tricky, so test before the event starts.
Final takeaway
If you want to avoid shaky drone footage, do three things first: inspect your props, shoot in calmer conditions, and fly much more gently than you think you need to. Most bad drone video is not ruined in editing. It is ruined by haste before takeoff and rough control in the air.
